See the 中文文档 for Chinese readme.
- Introduction
- Usage
- Prerequisites
- Create a key pair
- Download plugin
- Configure clouds
- Navigate to Configure Clouds Menu
- Add New Cloud
- Tick Jenkins Master In Private Network
- Configure "Cloud Name"
- Configure "Credentials"
- Configure "Region" -Required
- Configure "Image" -Required
- Configure "VPC" -Optional
- Configure "Security Group" -Optional
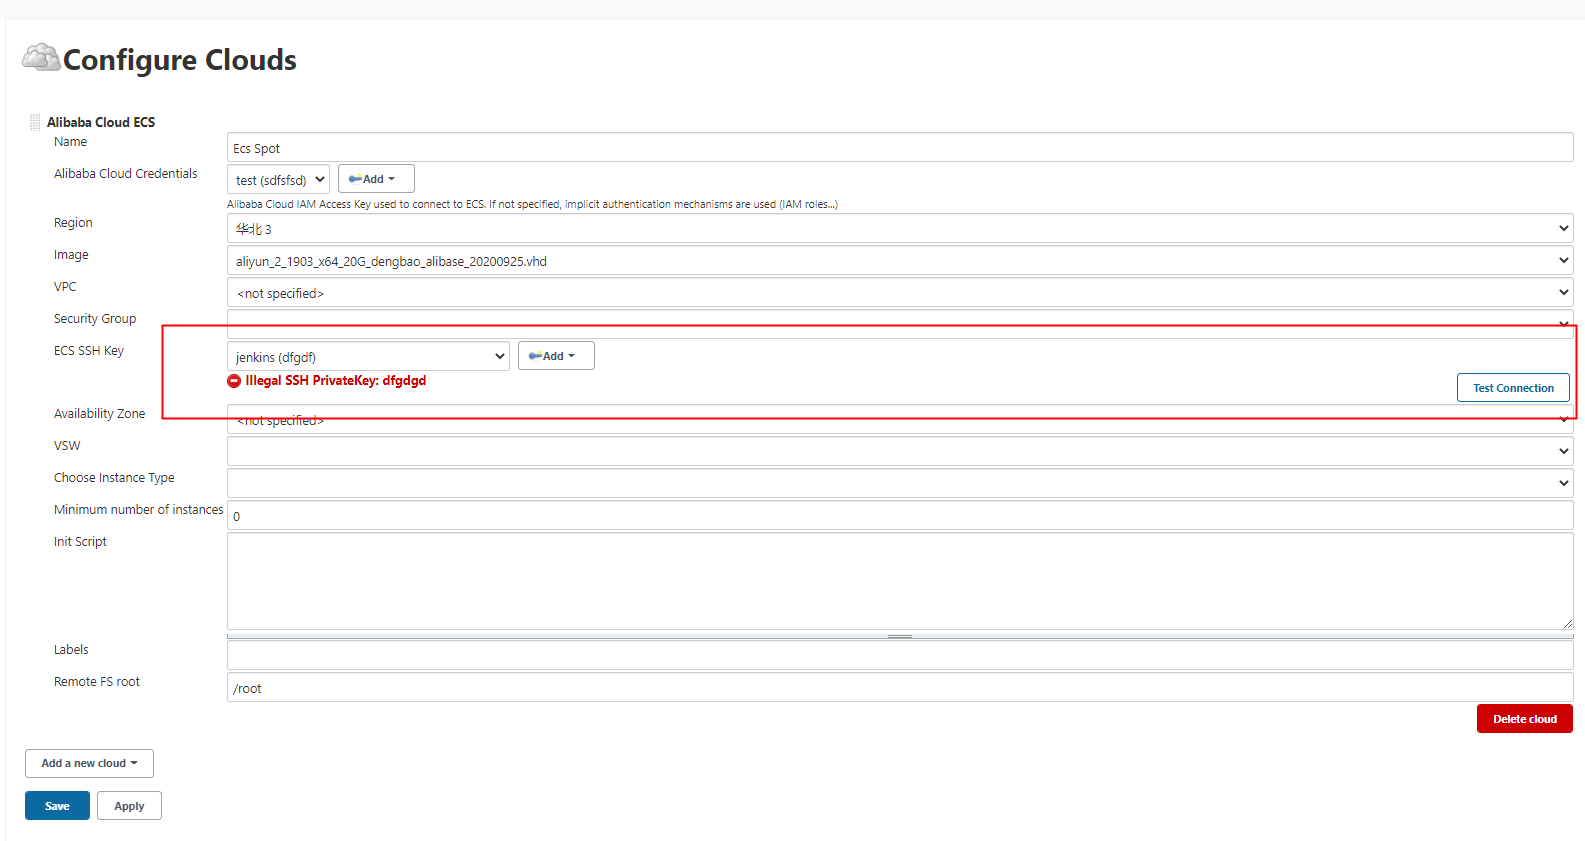
- Configure "ECS SSH Key" -Required
- "Test Connection" -Required
- Configure "Available Zone" -Optional
- Configure "VSW" -Optional
- Configure "Instance Type" -Optional
- Configure "Minimum number of instances" -Optional
- Configure "Init Script" -Optional
- Configure "Labels" -Optional
- Configure "Remote FS root" -Optional
- Configure "Remote user" -Optional
- Configure System Disk Category -Optional
- Configure System Disk Size -Optional
- Configure Assign Public Ip
- Provision Nodes
- Trouble Shooting
- Change Log
- Contact us
This plugin implements Jenkins slave node provision mechanism. In CI/CD scenario, if your Jenkins master node is under high workload, use this plugin to provision slave ECS node, offloading master's workloads.
The graph below illustrate how the Jenkins Master & Slave mechanism works.

Before starting, please make sure you have met the following requirements:
- Alibaba Cloud Account. For international user, please refer to Alibaba Cloud Global Account
- Alibaba Cloud AccessKey/SecretKey for API access.
- Jenkins Master: A running Jenkins master is necessary, this plugins only provision slave node, and DOES NOT provision master node.

A key pair is necessary for the provisioned node in order to communicate with master node using SSH tunnel.
1.1 Login to ECS Console
1.2. Navigate to "Network and Security" > "Key Pair" menu

1.3. Generate a Key Pair Click "Create SSH Key Pair" button, generate the key according to the prompt, and save the generated key pair in ".PEM" format

2.1 Login to your own Jenkins console. Navigate to the "Manage Jenkins" > "Manage Plugins" > "Available" menu

2.2 Type and search "Alibaba Cloud ECS"

2.3 Install the plugin
Alibaba Cloud Credentials Plugin is necessary and will also be installed.
Once you have finished the installation of ECS plugin, navigate to "Manage Jenkins" > "Manage Node and Clouds" > "Configure Clouds" menu

Select "Alibaba Cloud ECS"

A name is mandatory to identify the clouds.

Whether the current Jenkins Master is deployed in the VPC intranet environment (that is, whether it has access to the public network). If your Jenkins Master is deployed in the intranet environment (that is, does not have access to the public network), please check this option, and follow-up plug-ins Calling the Alibaba Cloud SDK will use the VPC private network domain name to make requests. If this option is not checked, the public network domain name will be used for access by default, which will lead to unreachable access, so the subsequent use of the plug-in will result in a "ConnectTimeoutException" exception. If you have access to the public network (that is, you have access to the public network), you do not need to check this option. Subsequent calls to the Alibaba Cloud SDK will use the public network domain name for requests.
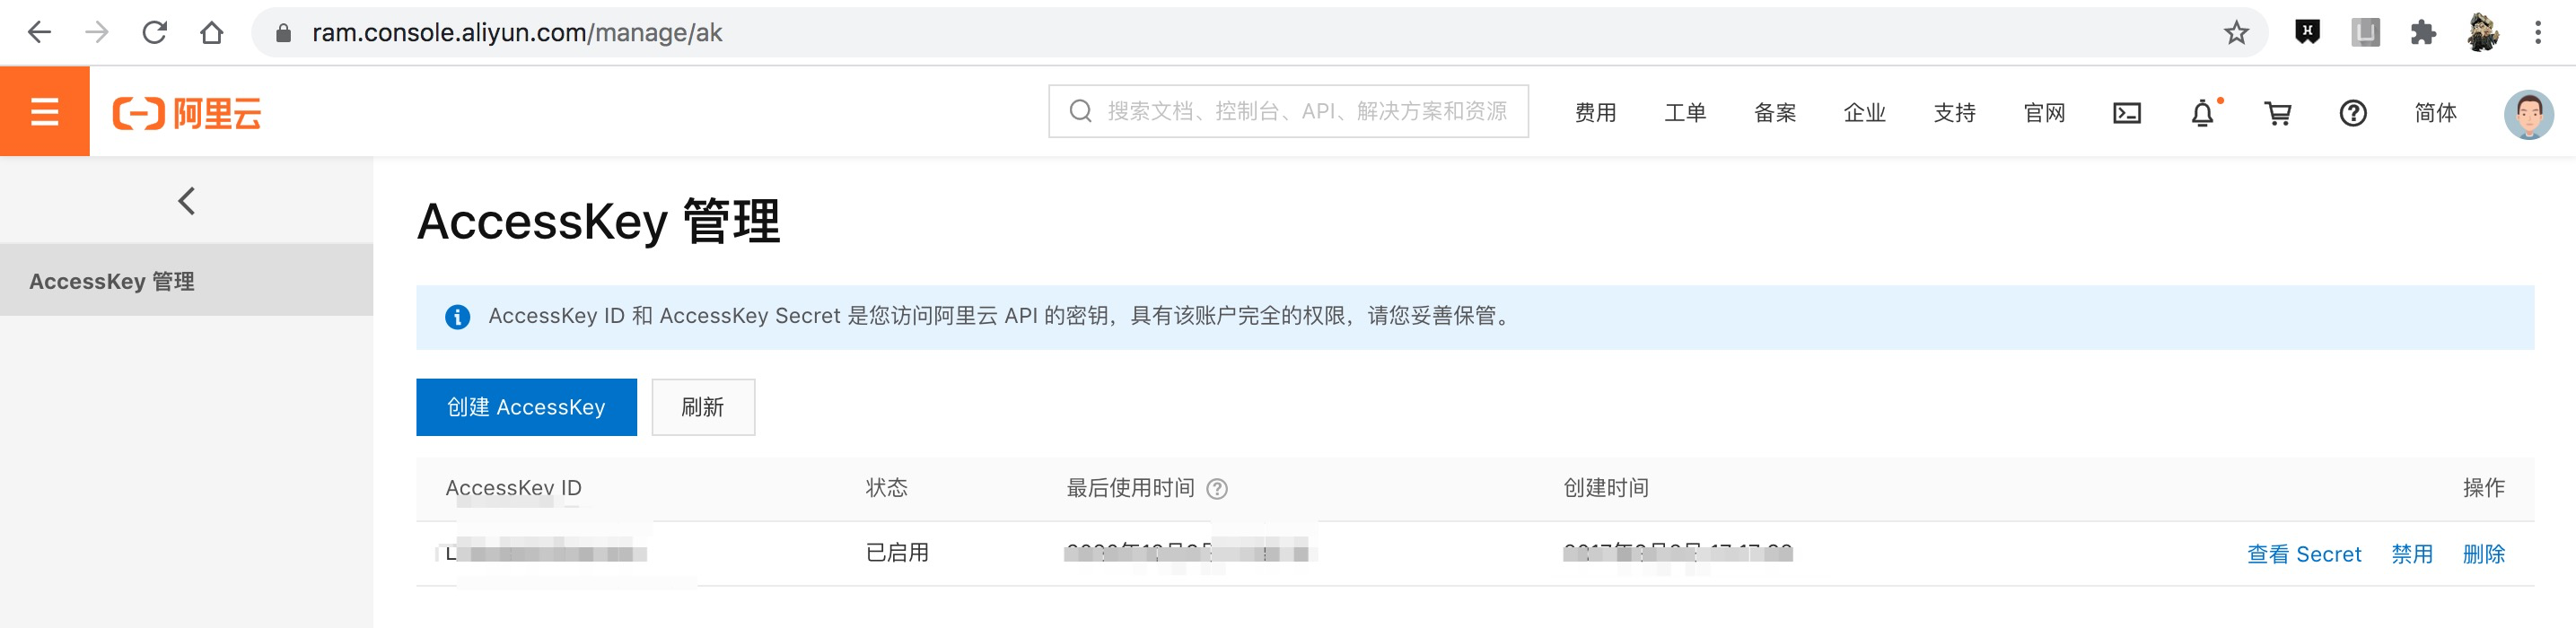
An effective is necessary. Plugin uses the credential(aka ak/sk) to invoke Alibaba Cloud ECS OpenAPI in order to create ECS as slave node.


- Type in the ak/sk you've previously created in Prerequisites part
- Please make sure you don't have any warnings listed below:


Select the credentials you've just created

Select the right region where the slave ECS node will be provisioned.

Select the right image type.

If there is any VPCs in your selected region, they will be listed in the "VPC" drop down list. And if no VPC found, a default VPC will be created with 172.16.0.0/12 CIDR block

If there is any Security Groups in your selected region, they will be listed in the "Security Group" drop down list. And if no security group found, a default security will be created with "22/22" port range access.

- Enter the SSH Key obtained in STEP 1: Create a key pair for ECS
- Currently, only "SSH username with private key" is supported.


Before going on, you should click "Test Connection" button to run a thoroughly check and make sure all the required items are successfully configured.

Select the right available zone where the slave ECS node will be provisioned. And if no Available Zone selected, a random zone will be selected.

Select the right vsw where the slave ECS node will be provisioned. And if no VSW selected, a random vsw that doesn't overlap with the existing vsws will be created.

Select the right instance type that the slave ECS node will be provisioned. And if no instance type selected, a random instance type will be selected.

Minimum number of instances is the number of follower nodes used to generate the follower. This plugin will create the follower according to the number filled in. The number should be at least 1

Init script is the shell script to be run on the newly launched follower node instance, before Jenkins starts launching a follower node. This is also a good place to install additional packages that you need for your builds and tests.
Whether to set the public network ip
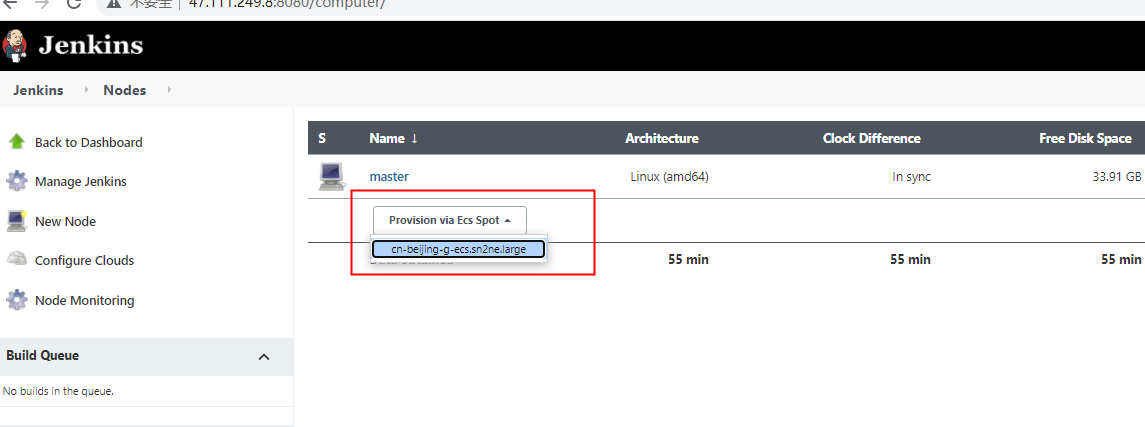
- After saving successfully, enter new nodes to add nodes. The initialization status is as follows:

- After clicking the instance of provision via pot, the follower node will be initialized as follows:

- After a while, the state will be restored after the connection.

- Click the node drop-down box to perform relevant operations on the follower node.

- Click Configure to view the follower node information

Either automatically upon Jenkins post-initialization or through Jenkins script console, example:
import com.alibabacloud.credentials.plugin.auth.AlibabaCredentials
import com.alibabacloud.jenkins.ecs.AlibabaCloud
import com.alibabacloud.jenkins.ecs.AlibabaEcsFollowerTemplate
import com.cloudbees.plugins.credentials.*
import com.cloudbees.plugins.credentials.domains.Domain
import hudson.model.*
import jenkins.model.Jenkins

def AlibabaCredentialsParameters = [
        id         : 'alibabacloud-jenkins-key',
        description: 'Jenkins Key For Alibaba Cloud',
        accessKey  : '${your-alibaba-cloud-ak}',
        secretKey  : '${your-alibaba-cloud-sk}'
]

def AlibabaCloudFollowerTemplateParameters = [
        region                  : '${your-region-no}', // cn-qingdao
        zone                    : '${your-zone-no}', // cn-qingdao-c
        instanceType            : '${your-instance-type}', // ecs.sn2ne.2xlarge
        minimumNumberOfInstances: 1,
        vsw                     : '${your-vsw-id}',
        initScript              : "",
        labelString             : 'Jenkins Agent',
        remoteFs                : "/root",
        remoteAdmin             : "root"
]

def AlibabaCloudParameters = [
        cloudName    : 'AlibabaCloudECS',
        sshKeyId     : '${your-ssh-key-id}', // 请先在 Dashboard/Credentials 里配置好SSH Key, 这里放的是SSH Key的ID
        image        : '${your-image-id}',
        vpc          : '${your-vpc-id}',
        securityGroup: '${your-sg-id}'
]

// https://github.com/jenkinsci/alibabacloud-credentials-plugin/blob/master/src/main/java/com/alibabacloud/credentials/plugin/auth/AlibabaCredentials.java
AlibabaCredentials alibabaCredentials = new AlibabaCredentials(
        CredentialsScope.GLOBAL,
        AlibabaCredentialsParameters.id,
        AlibabaCredentialsParameters.accessKey,
        AlibabaCredentialsParameters.secretKey,
        AlibabaCredentialsParameters.description
)

// get Jenkins instance
Jenkins jenkins = Jenkins.getInstance()

// get credentials domain
def domain = Domain.global()

// get credentials store
def store = jenkins.getExtensionList('com.cloudbees.plugins.credentials.SystemCredentialsProvider')[0].getStore()

// add credential to store
store.addCredentials(domain, alibabaCredentials)

// https://github.com/jenkinsci/alibabacloud-ecs-plugin/blob/master/src/main/java/com/alibabacloud/jenkins/ecs/AlibabaEcsFollowerTemplate.java
AlibabaEcsFollowerTemplate slaveTemplateQingdao = new AlibabaEcsFollowerTemplate(
        AlibabaCloudFollowerTemplateParameters.region,
        AlibabaCloudFollowerTemplateParameters.zone,
        AlibabaCloudFollowerTemplateParameters.instanceType,
        AlibabaCloudFollowerTemplateParameters.minimumNumberOfInstances,
        AlibabaCloudFollowerTemplateParameters.vsw,
        AlibabaCloudFollowerTemplateParameters.initScript,
        AlibabaCloudFollowerTemplateParameters.labelString,
        AlibabaCloudFollowerTemplateParameters.remoteFs,
)

// https://github.com/jenkinsci/alibabacloud-ecs-plugin/blob/master/src/main/java/com/alibabacloud/jenkins/ecs/AlibabaCloud.java
AlibabaCloud alibabaCloud = new AlibabaCloud(
        AlibabaCloudParameters.cloudName,
        AlibabaCredentialsParameters.id,
        AlibabaCloudParameters.sshKeyId,
        AlibabaCloudFollowerTemplateParameters.region,
        AlibabaCloudParameters.image,
        AlibabaCloudParameters.vpc,
        AlibabaCloudParameters.securityGroup,
        AlibabaCloudFollowerTemplateParameters.zone,
        AlibabaCloudFollowerTemplateParameters.vsw,
        AlibabaCloudFollowerTemplateParameters.instanceType,
        AlibabaCloudFollowerTemplateParameters.minimumNumberOfInstances,
        AlibabaCloudFollowerTemplateParameters.initScript,
        AlibabaCloudFollowerTemplateParameters.labelString,
        AlibabaCloudFollowerTemplateParameters.remoteFs
)

// add cloud configuration to Jenkins
jenkins.clouds.add(alibabaCloud)

// save current Jenkins state to disk
jenkins.save()
-
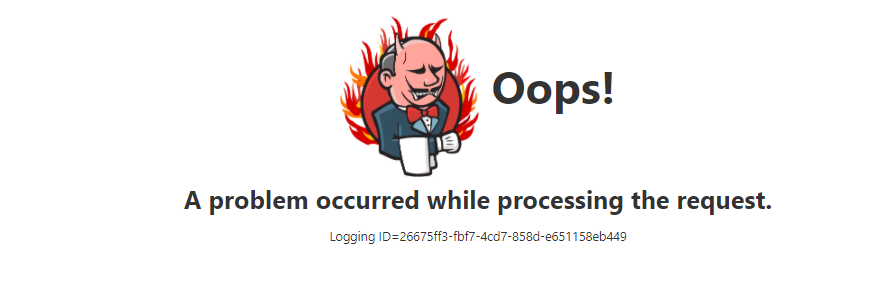
When you click the Save button, if the "SSH username with private key" connection test fails, the save will succeed, but "provision node" will report an error of "a problem occurred while processing the request". Therefore, please ensure that the connection is successful before saving.
-
Examples are as follows:


-
If you have any questions or requirements, please scan the following QR code with DingTalk QRCode
-
DingTalk Group Number:44723358
-
DingTalk Group QR code