Kobiton is a mobile-first testing platform purpose-built for enterprises with the power to deliver faster release cycles and exceptional user experiences. As a mobile-centric testing platform, we pride ourselves on our top-tier customer service, platform capabilities, and product stability. Learn more about Kobiton here.
This Kobiton Jenkins plugin allows you to integrate and run your automation test cases from a Jenkins CI server on Kobiton's device pool.
This plugin provides additional functionality for user to interact with Kobiton platform and services:
- Upload an application to the Kobiton Apps Repository.
- Upload a new version for an existing application in the Kobiton Apps Repository.
- Run appium tests with a specific app version on devices hosted by Kobiton
The following are required to use the plugin:
- An existing Jenkins CI server (version 2.387.3 or later).
- A Kobiton account. You can sign-up for free trial if you do not have an existing account.
- Other plugins:
To run your Appium tests with Jenkins on Kobiton devices, you will first need to download our Jenkins plugin. Before installing the plugin, ensure you have the necessary privileges to administer your Jenkins installation. We recommend doing this when there are no active build jobs running on Jenkins.
- Click on Manage Jenkins > Manage Plugins.
- Select the Available tab.
- In the search box type Kobiton.
- Choose Kobiton from the list of available plugins.
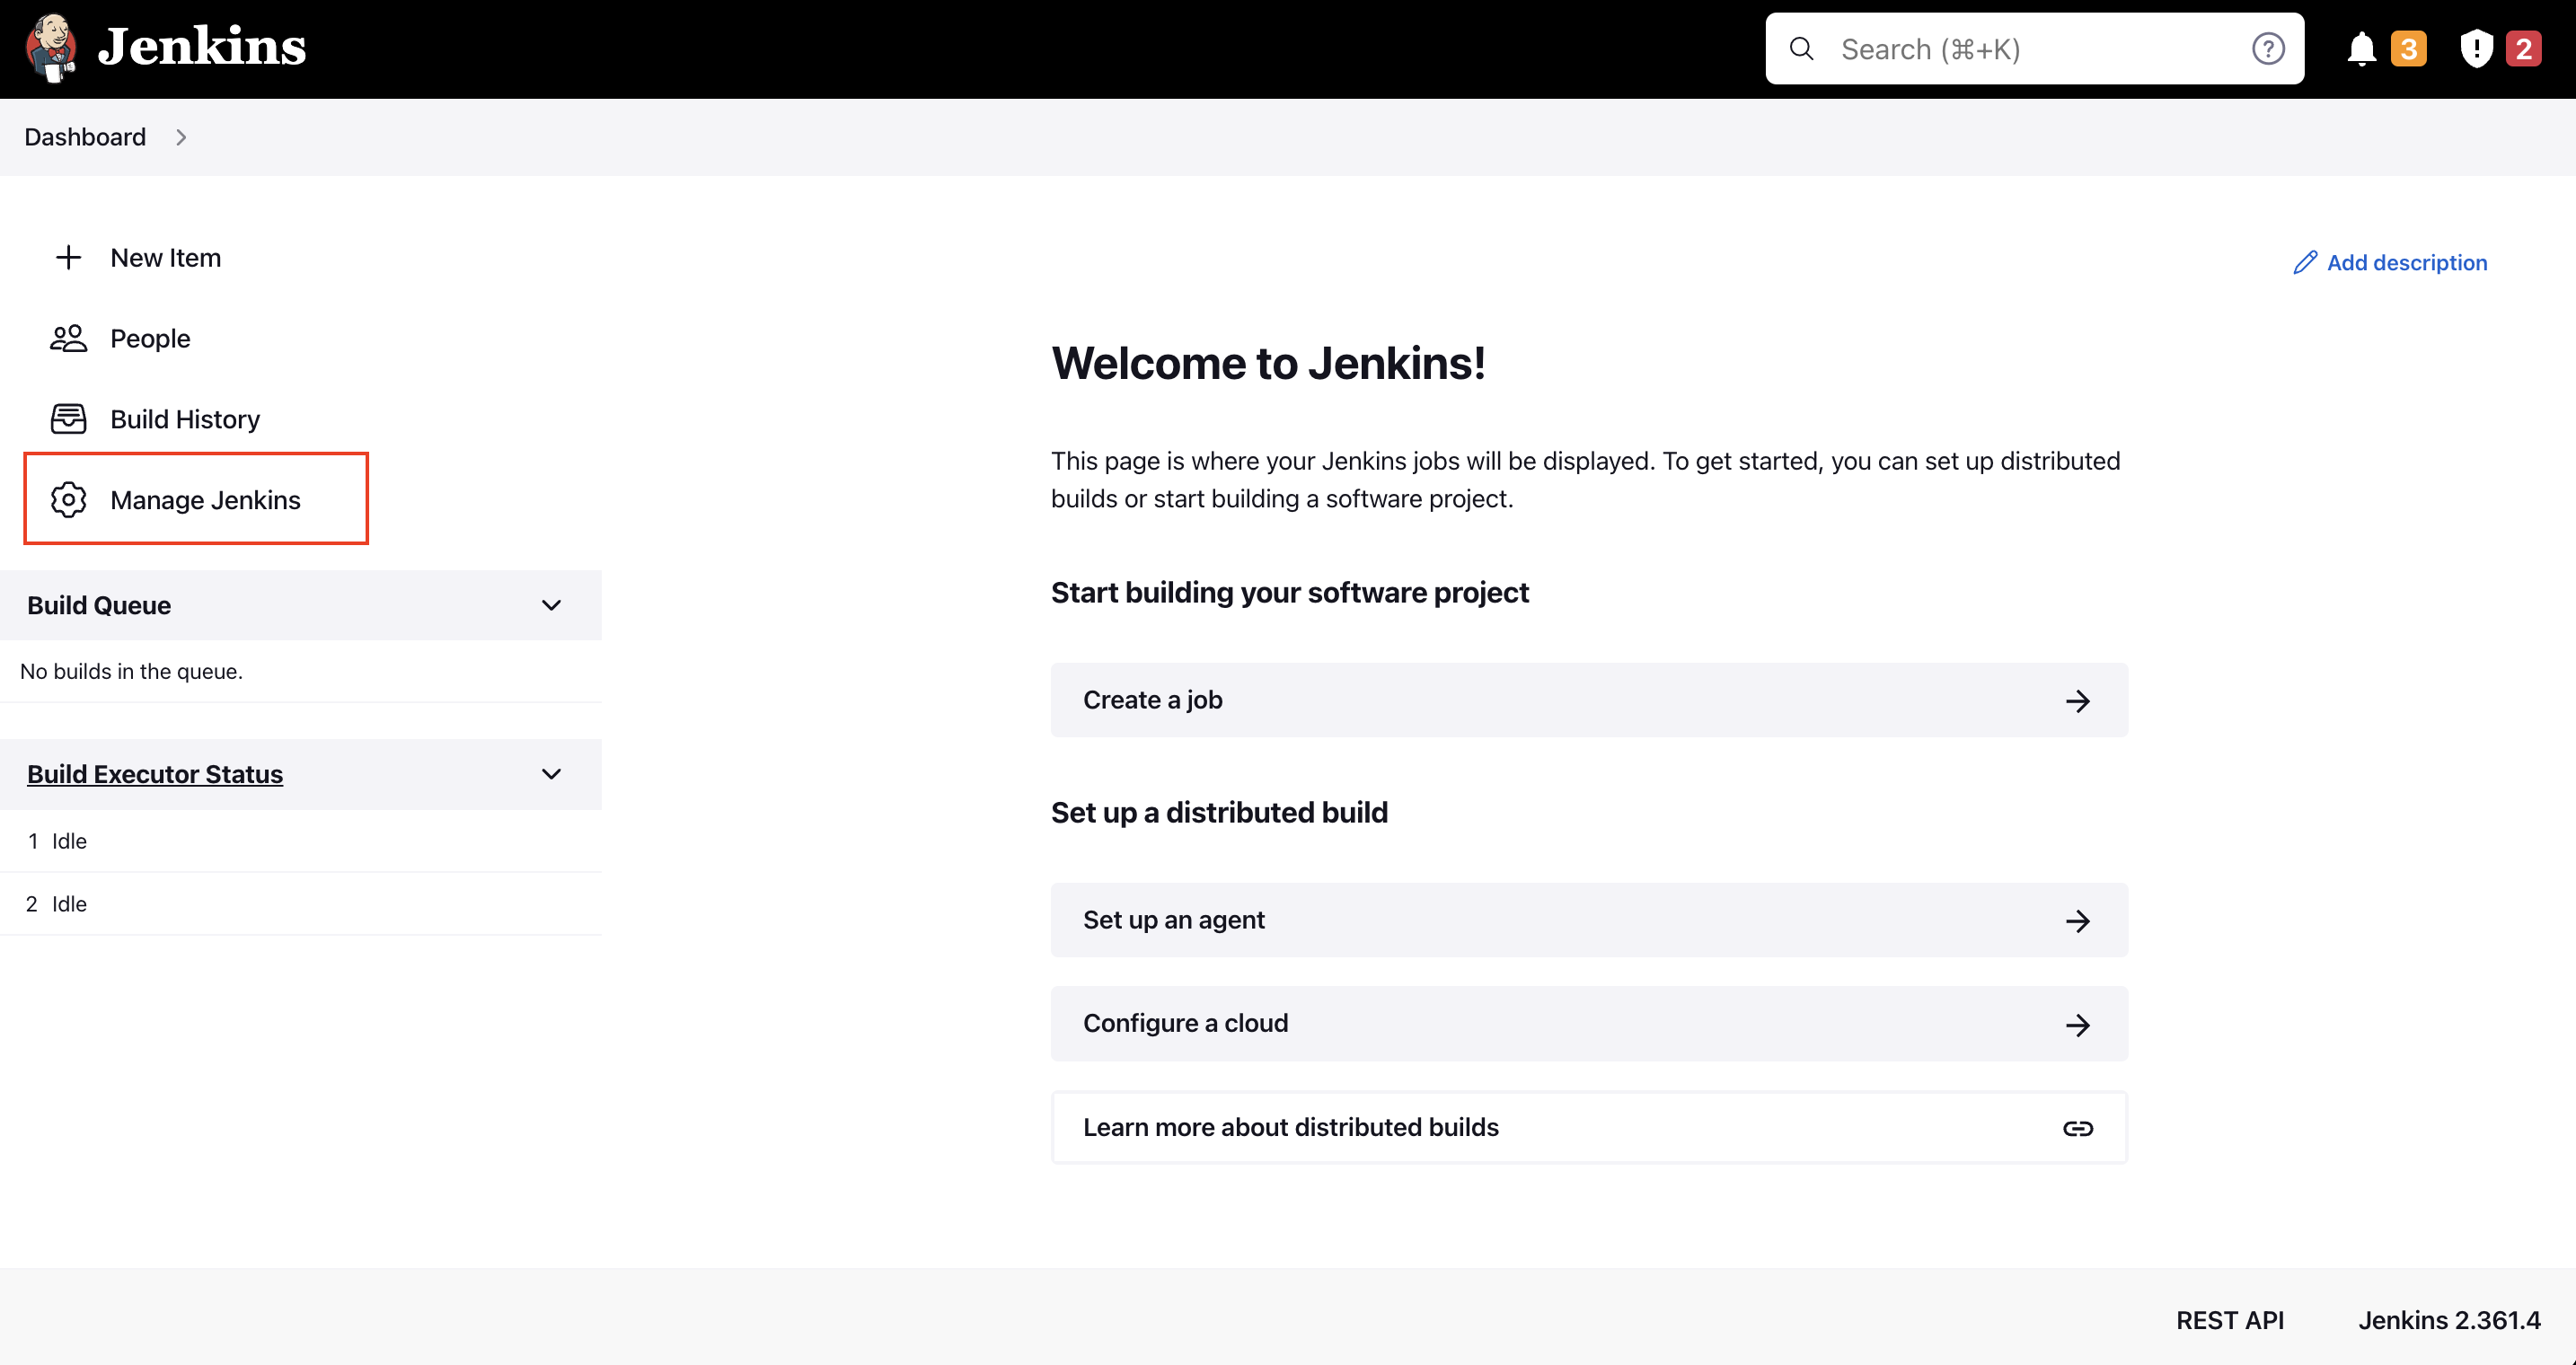
Navigate to your Jenkins Dashboard, click Manage Jenkins.
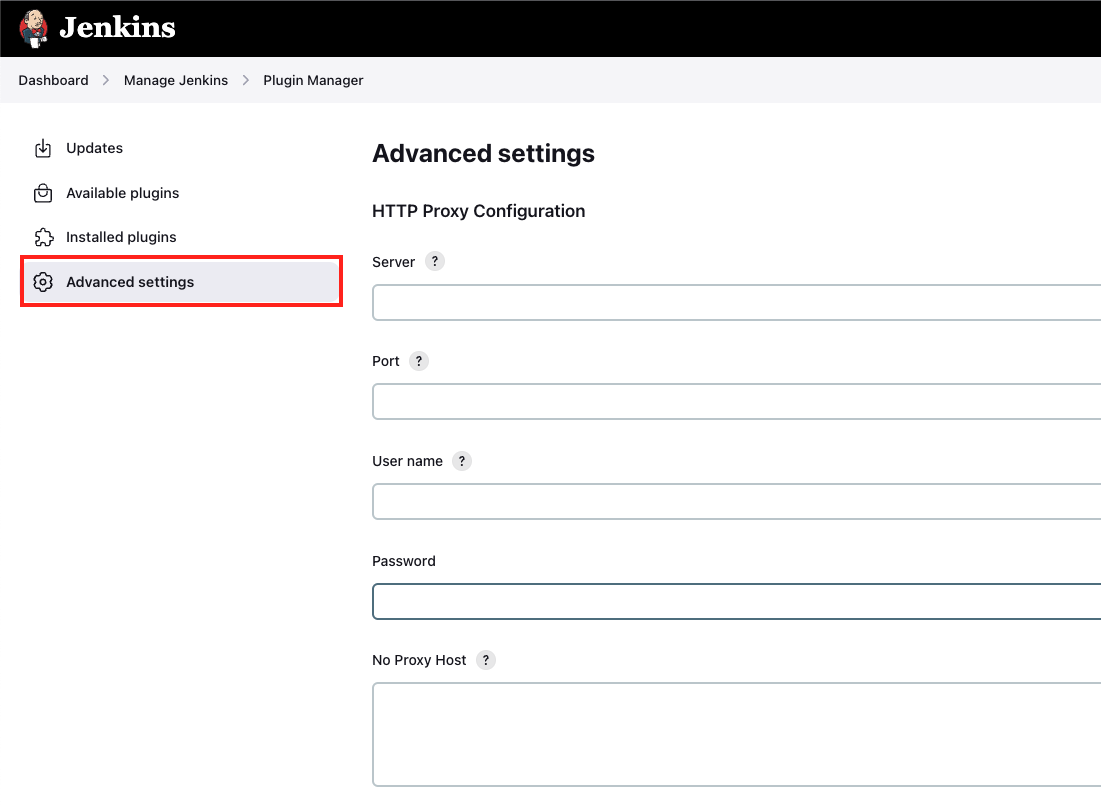
Go to Manage Plugins > Advanced Settings.
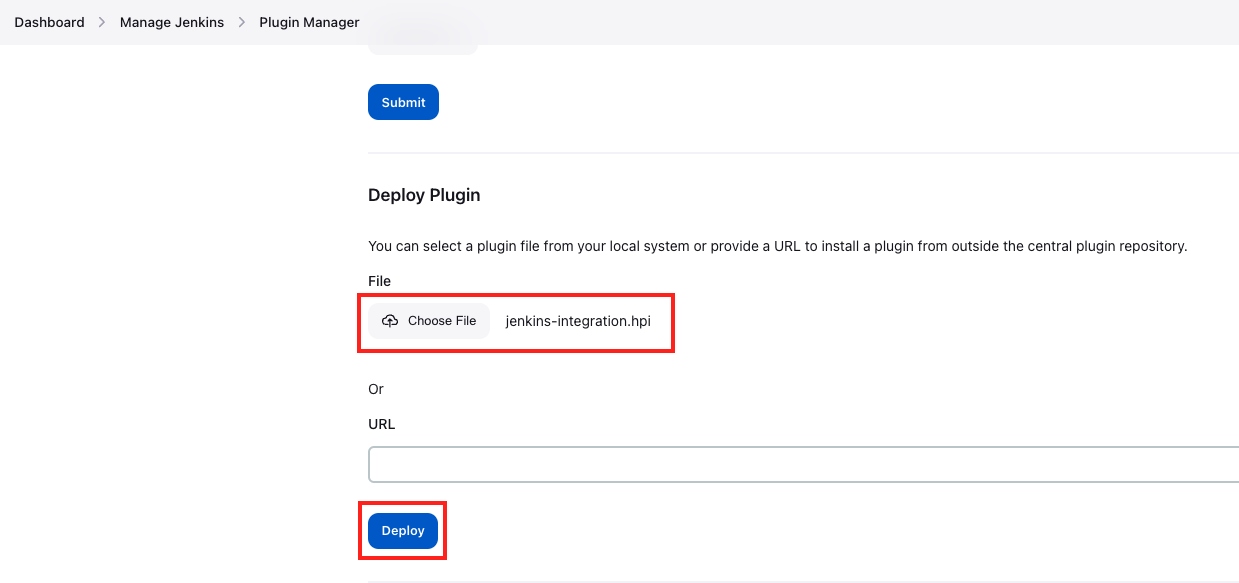
In the Deploy Plugin section, click Choose File and choose the downloaded plugin file. Then, click Deploy.
Restart Jenkins to activate the plugin.
📝 Note: In this example, we will execute a Node.js script hosted on GitHub. We need the NodeJS plugin to support this. Depending on your use case, you may need to install other plugins and configure accordingly.
Access Jenkins, then click on Manage Jenkins > Manage Plugins → Available Plugins.
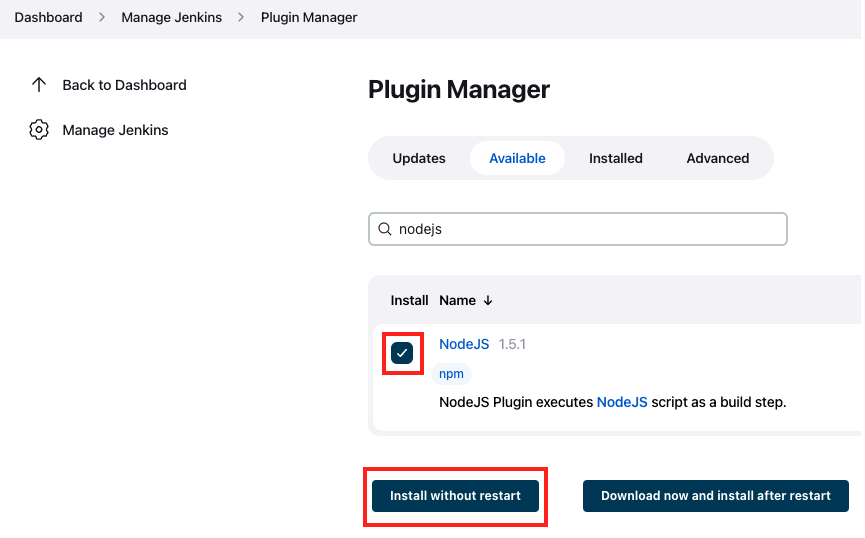
Search for GitHub Integration Plugin and NodeJS, select their checkboxes, then click Install without restart.
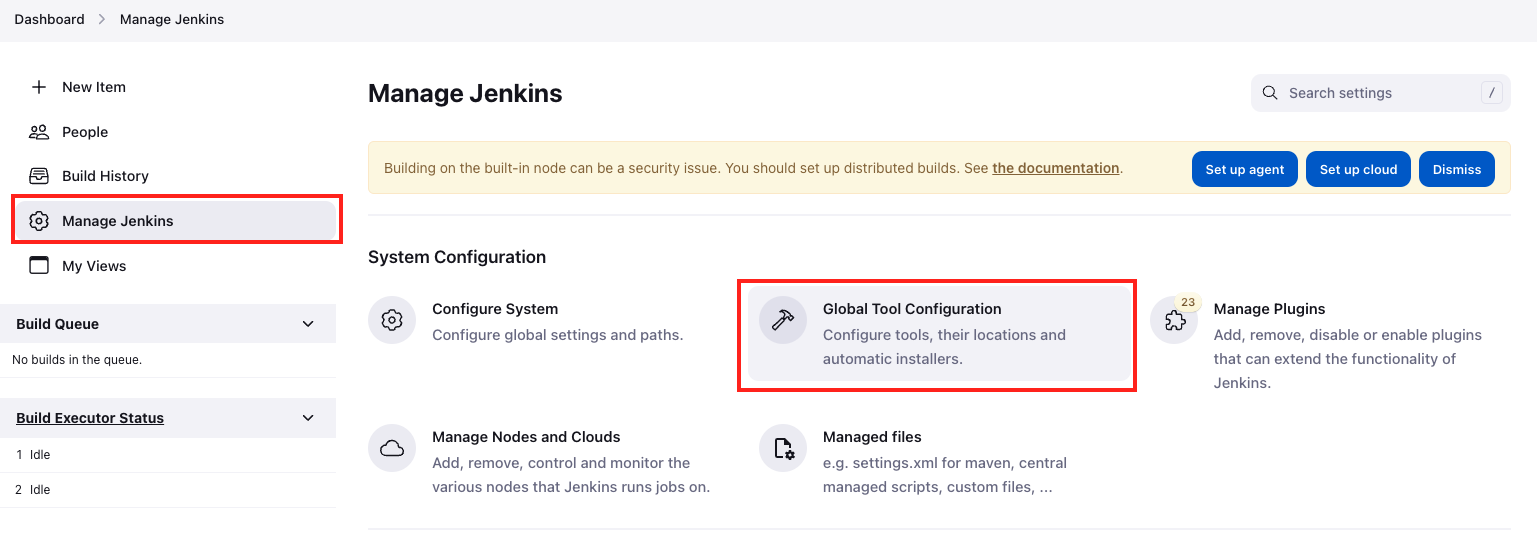
Next, add a global configuration for Node.js. In the Jenkins dashboard, go to Manage Jenkins > Global Tool Configuration.
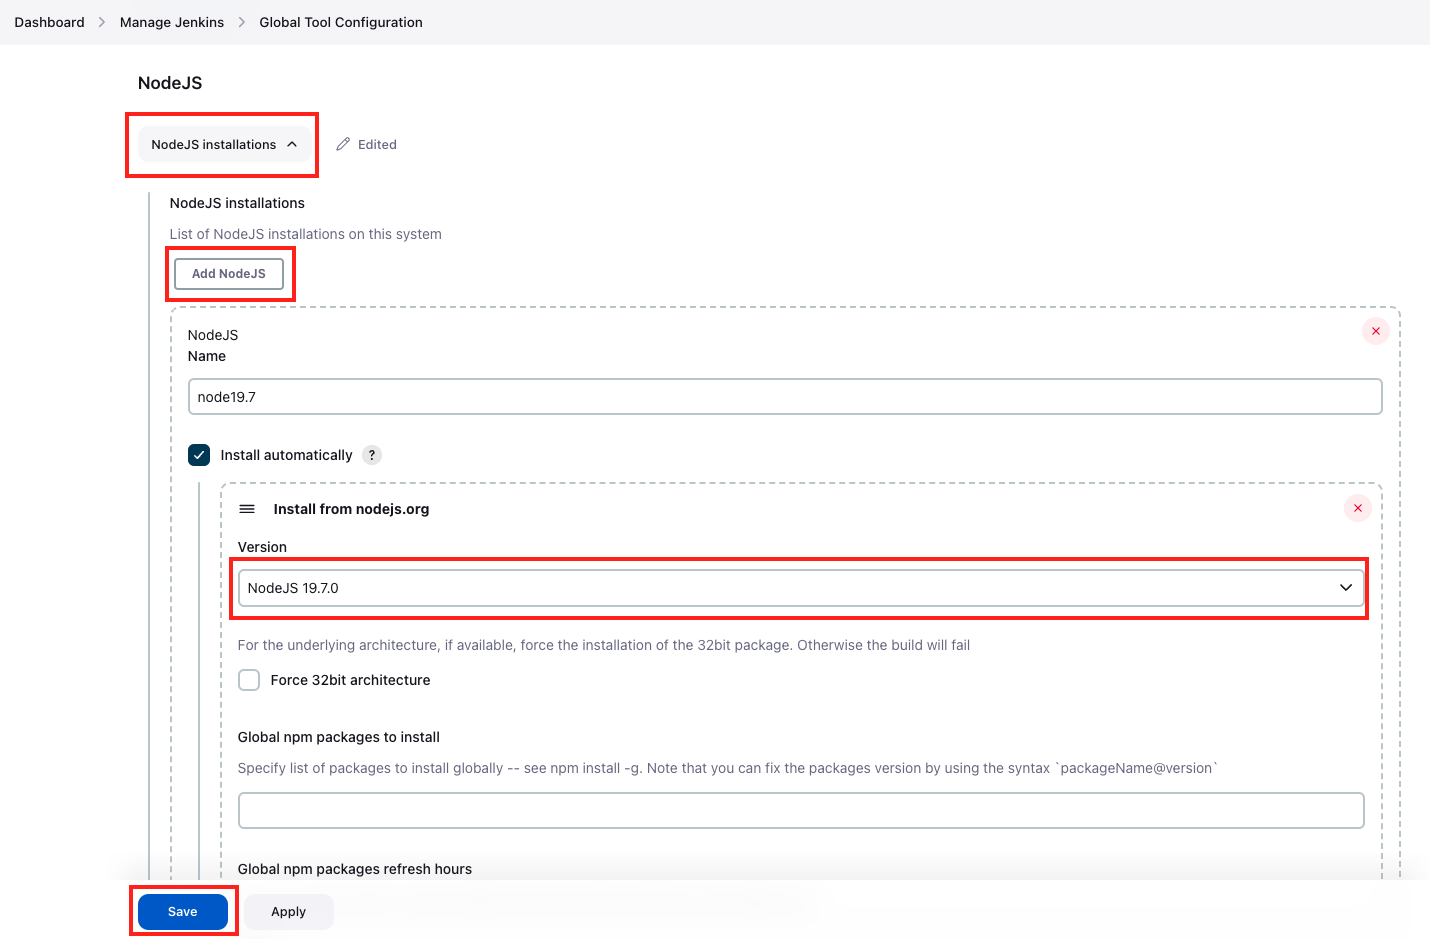
If NodeJS plugin is installed, the NodeJS section is available. Click NodeJS Installations > Add NodeJS, then input a name and choose the NodeJS version from the dropdown. Click Save.
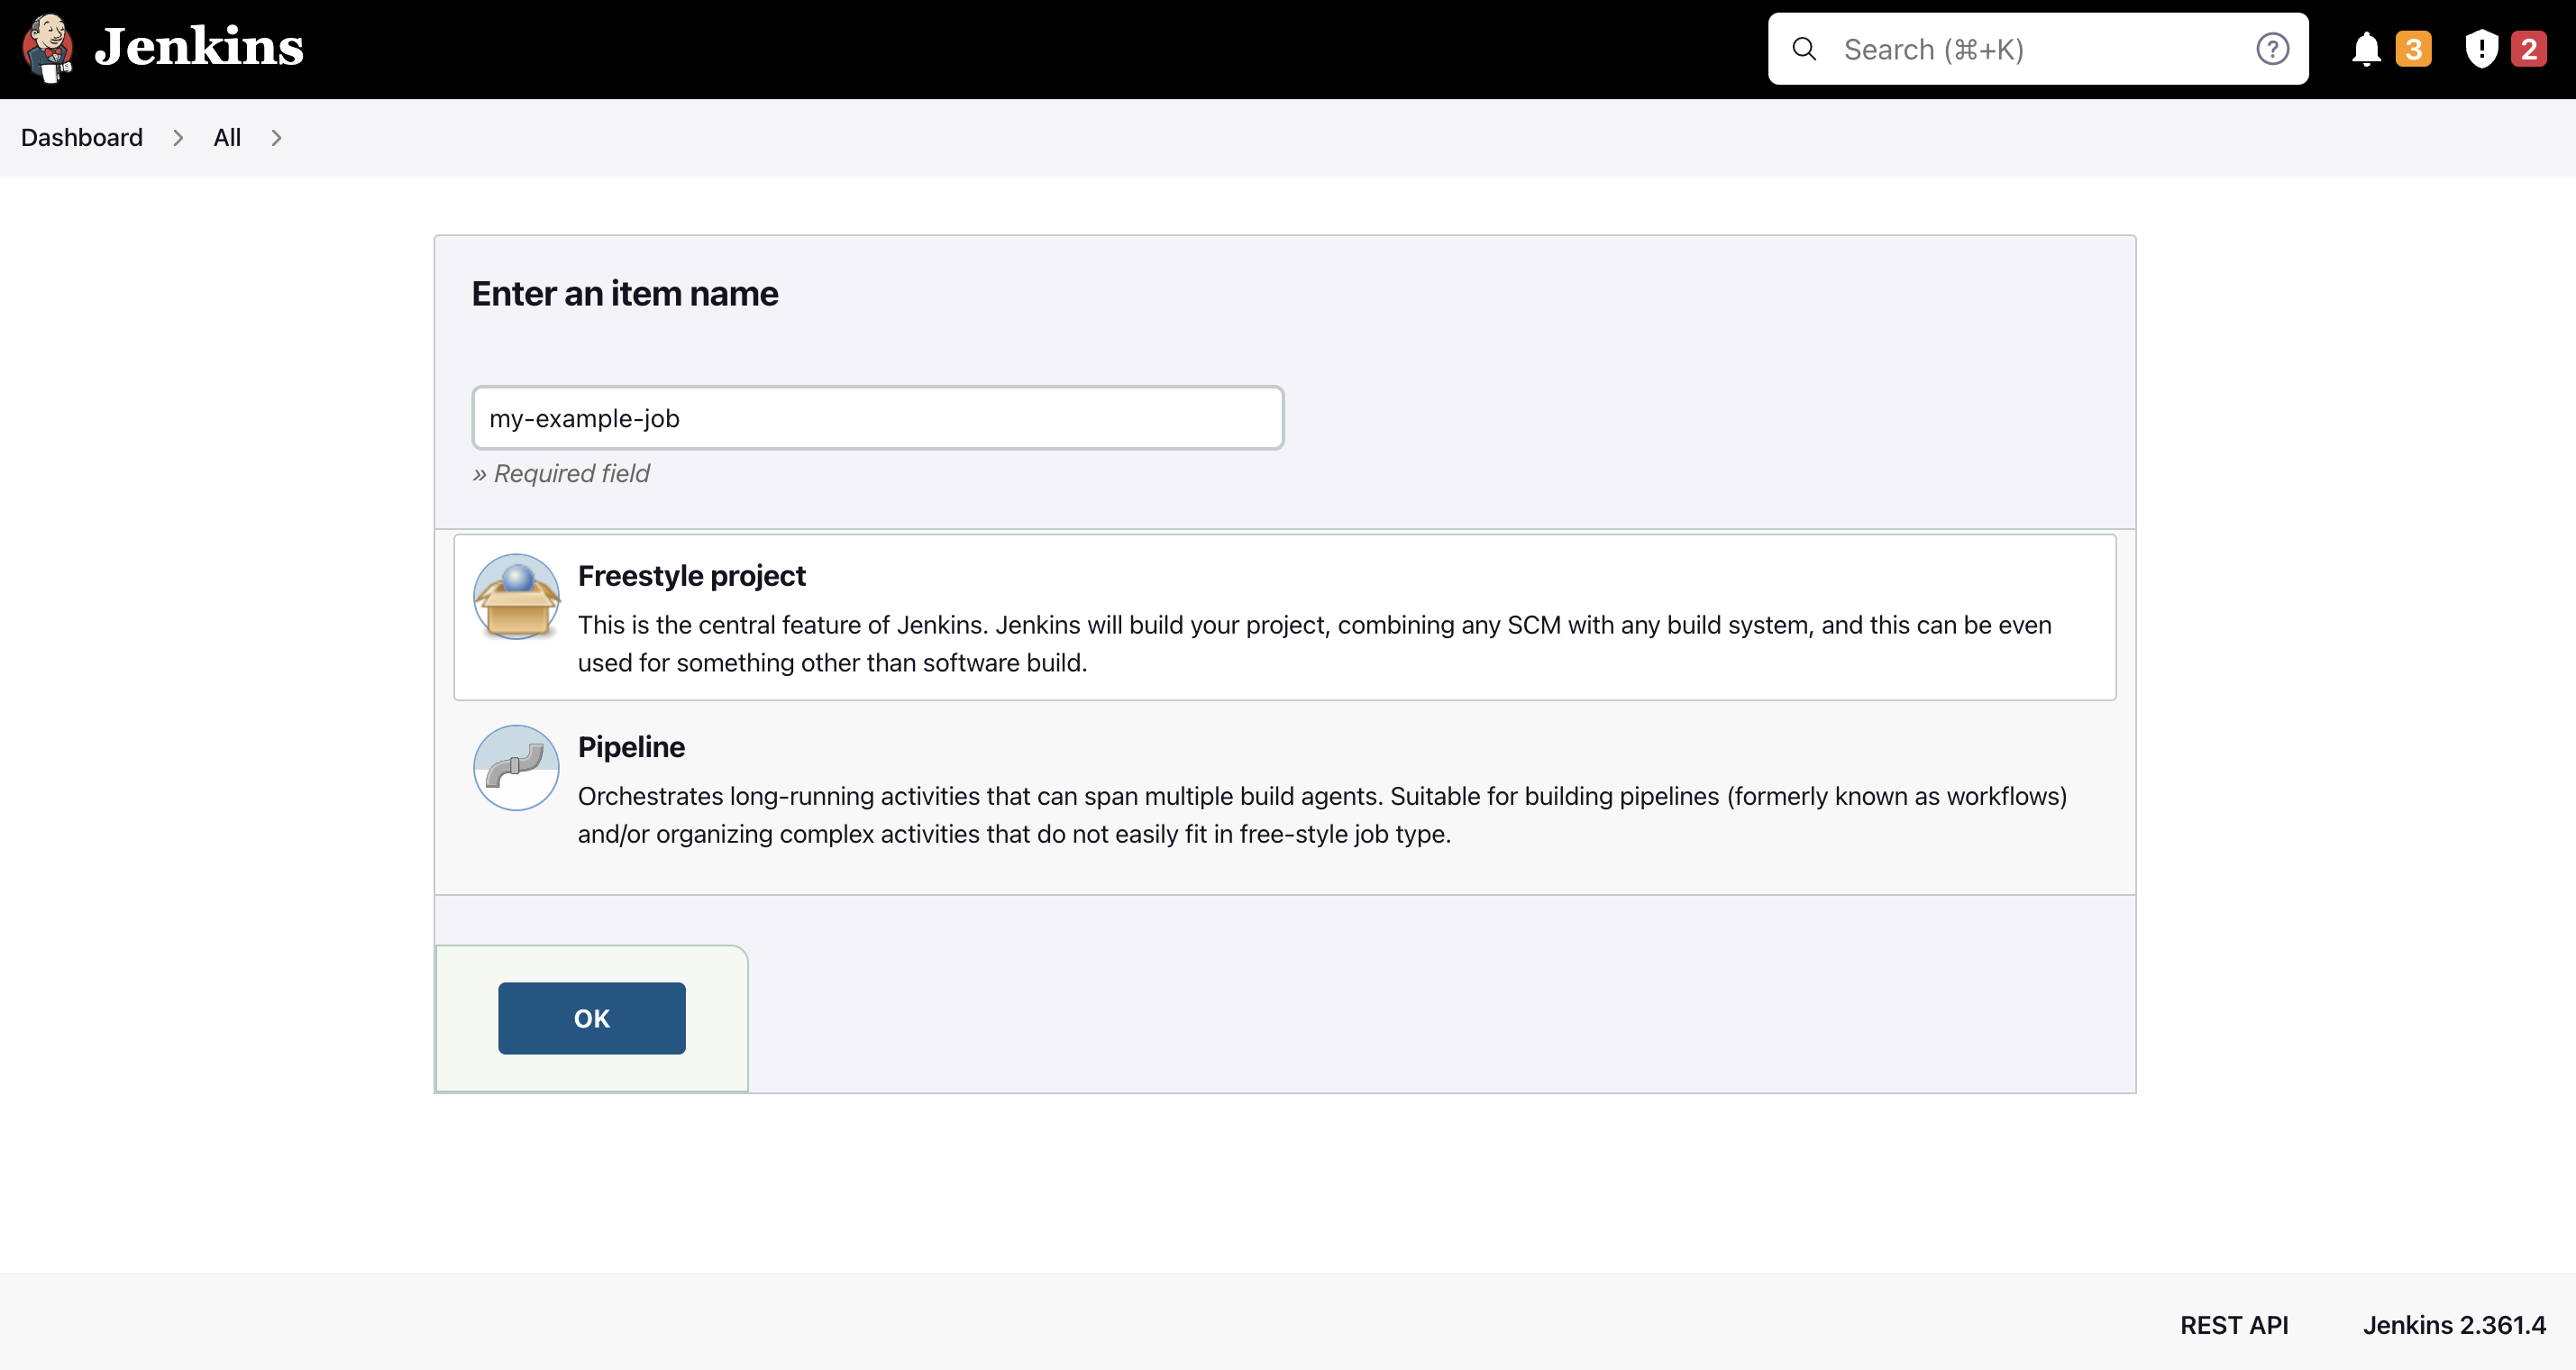
In the dashboard, click + New Item. Enter a name for your job and choose Freestyle project, then click OK.
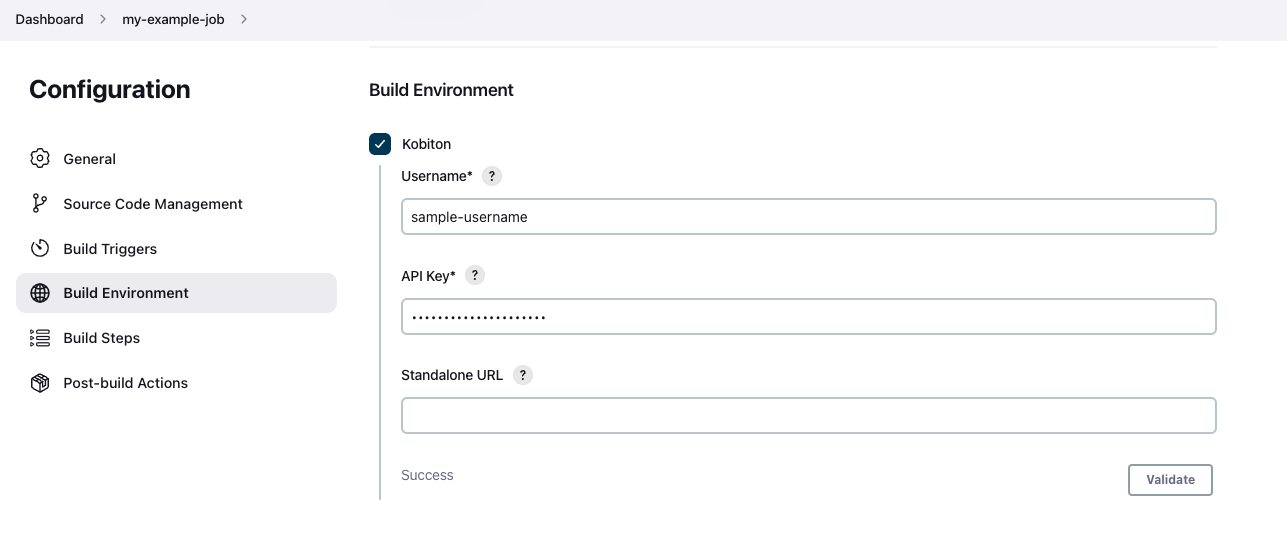
In the Build Environment section, select Kobiton checkbox, then add your Kobiton username and API key. You can find this in the Portal.
💡 Tip: You can click the Validate button to check if your credentials are correct.
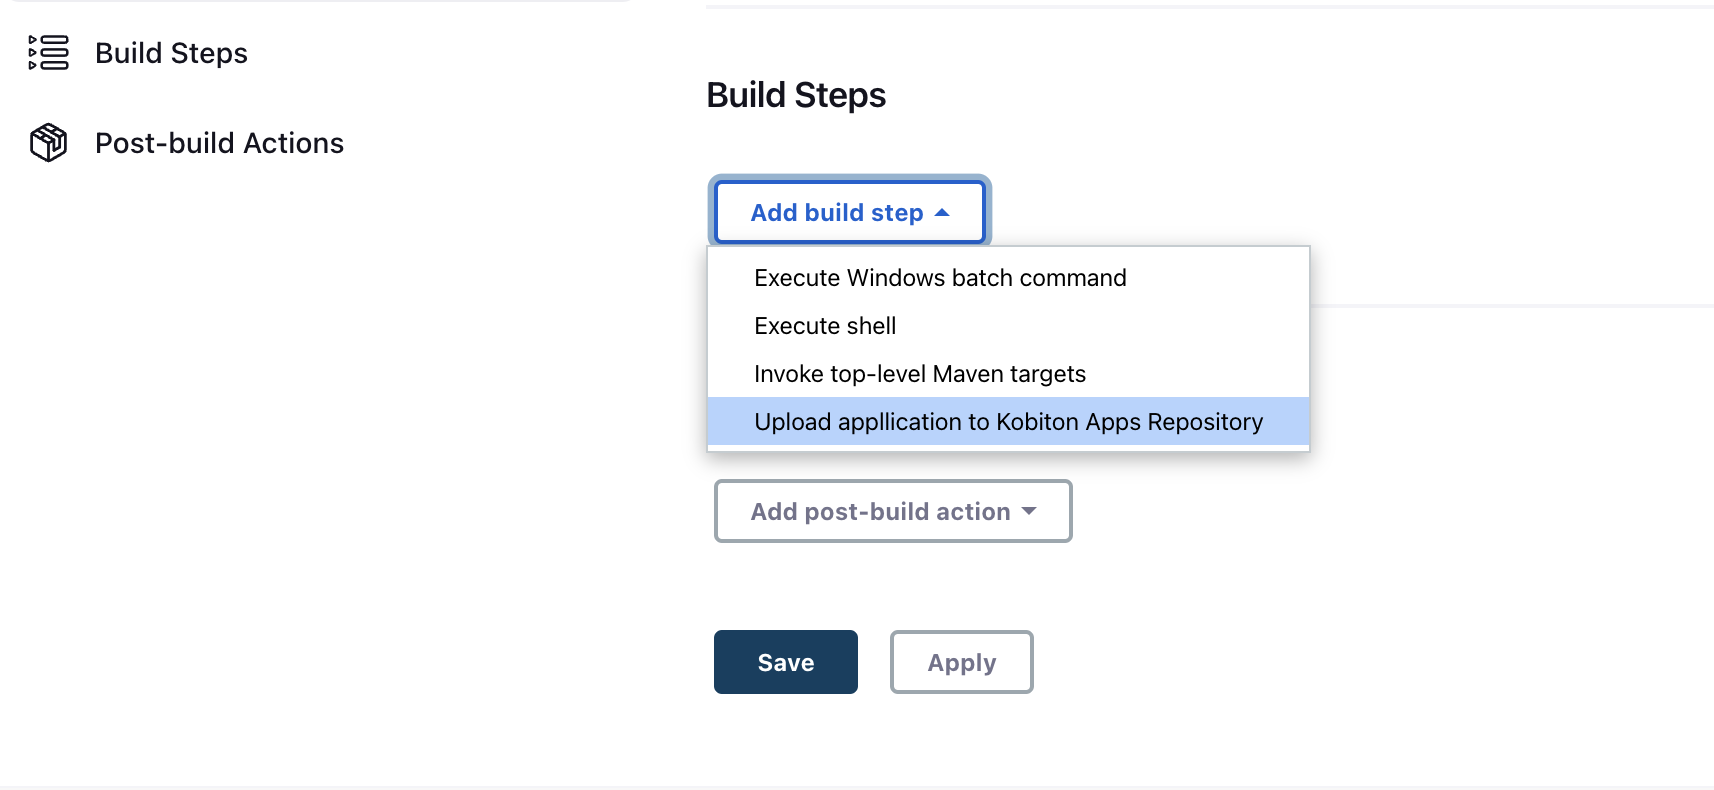
In the Build Steps section, click Add build step, then select Upload application to Kobiton Apps Repository from the dropdown list.
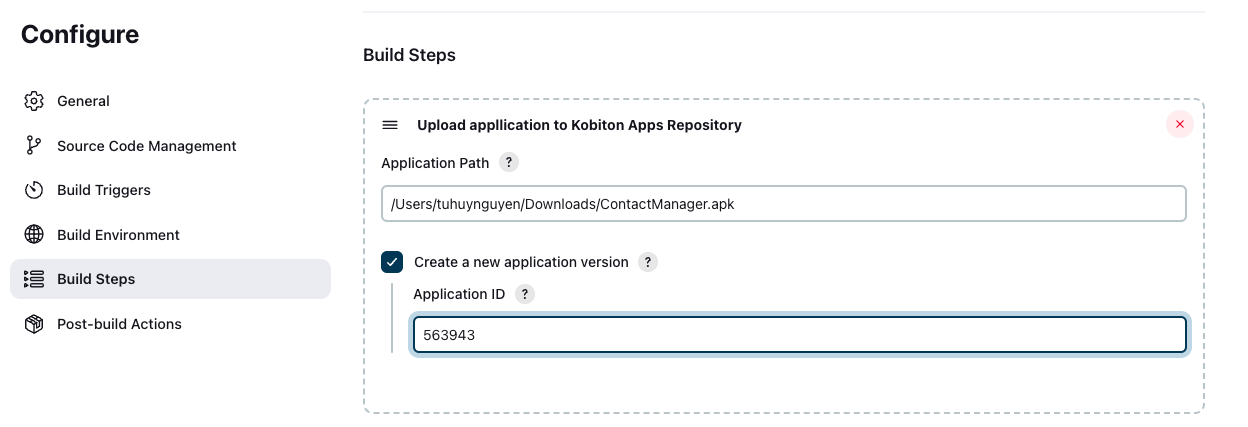
Provide the local path to your application file.
Optional: If your application has already been published to Apps Repository, you can upload a new version by selecting Create a new application version checkbox. Then, provide the App ID (obtainable from the App Tiles in the Portal).
💡 Tip: You can click on the "?" icon to expand detailed help.
The Kobiton plugin will set these environment variables:
KOBITON_APP_ID: The App ID of the uploaded application.KOBITON_USERNAME: Your Kobiton username.KOBITON_API_KEY: Your Kobiton API key.
You will need to use these environment variables to set the desired capabilities in your script. Bellow is an example:
const username = process.env.KOBITON_USERNAME
const apiKey = process.env.KOBITON_API_KEY
const appId = process.env.KOBITON_APP_ID

const desiredCaps = {
  sessionName:        'Automation test session - App',
  sessionDescription: 'This is an example for Android app',
  deviceOrientation:  'portrait',
  captureScreenshots: true,
  deviceName:         'Galaxy*',
  platformName:       'Android',
  app:                appId,
}
📝 Note: A Node.js script is used in this example. The actual steps may vary depending on the programming language and test framework of your scripts.
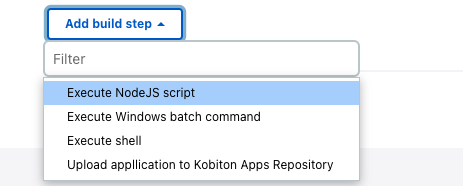
In Build Steps section, click Add build step, select Execute NodeJS script from the dropdown list.
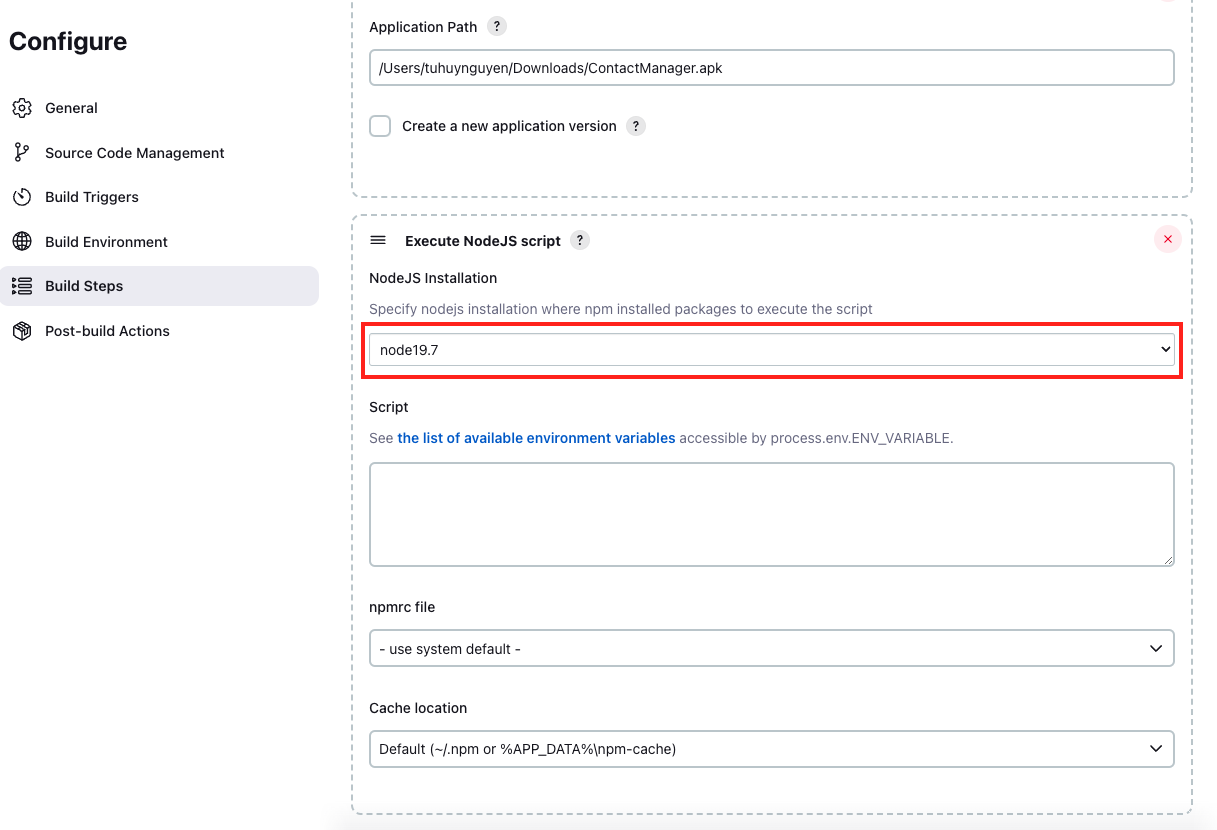
In NodeJS Installation, choose the name of NodeJS you had configured in Global Tool Configuration.
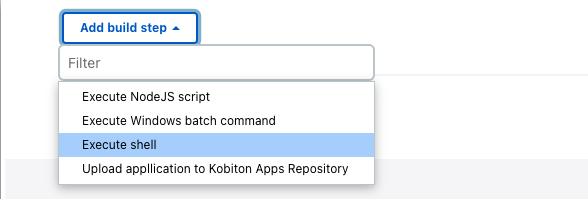
Click Add build step to add nother step, then choose Execute shell.
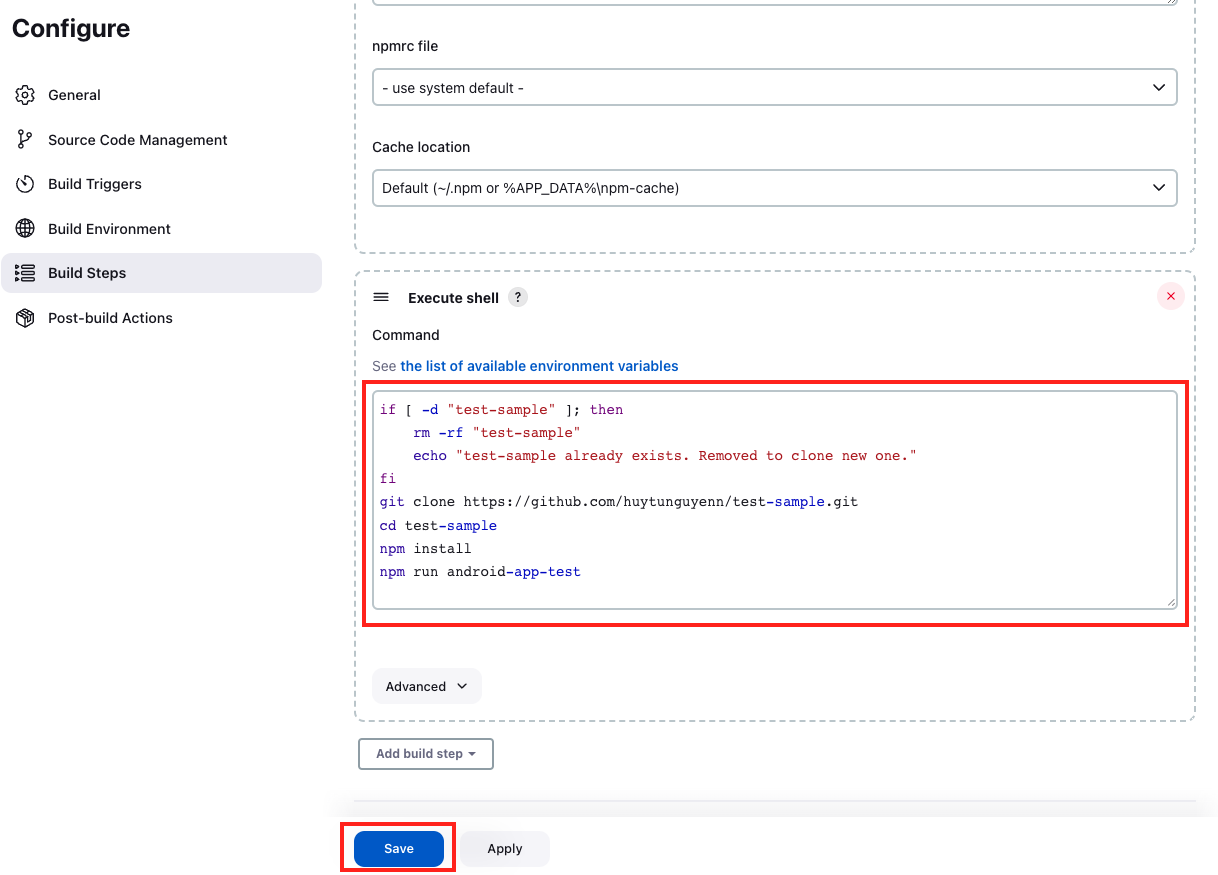
Then paste the script below into the field:
📝 Note: The script used here is a sample Node.js test script from the Kobiton public repository. Replace this with your actual script.
if [ -d "test-sample" ]; then
    rm -rf "test-sample"
    echo "test-sample already exists. The folder was removed in order to clone a new one."
fi
git clone https://github.com/kobiton/samples.git
cd samples/javascript-jenkins
npm install
npm run android-app-test
Save the job configuration.
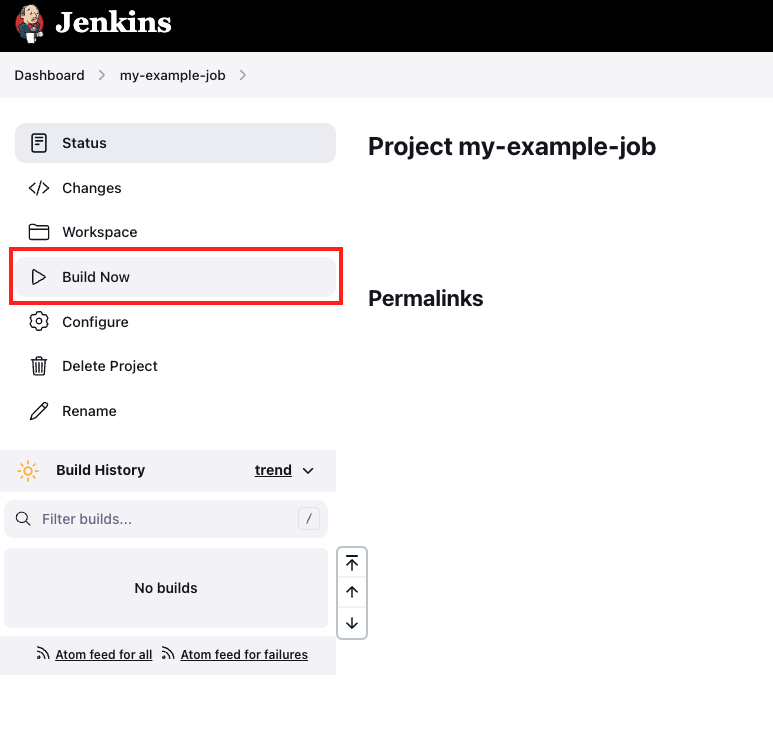
Navigate back to the job's main page. Click Build Now to run the job.
When the job finishes, click the build result > Console Output. The result should be similar to the below:
...

Upload application to Apps Repository successfully. Application details: { versionId='620626' }.

...

 > CALL init({"sessionName":"Automation test session - App","sessionDescription":"This is an example for Android app","deviceOrientation":"portrait","captureScreenshots":true,"deviceName":"Galaxy*","platformName":"Android","app":"kobiton-store:v620626"})
 > POST /session {"desiredCapabilities":{"sessionName":"Automation test session - App","sessionDescription":"This is an example for Android app","deviceOrientation":"portrait","captureScreenshots":true,"deviceName":"Galaxy*","platformName":"Android","app":"kobiton-store:v620626"}}

...

SessionID used for the next step 5505018
    ✓ should open the app
 > CALL quit()
 > DELETE /session/:sessionID

 ...

   1 passing (24s)

Finished: SUCCESS
The session ID is 5505018 in this sample output.
You can use the above ID to view your test report in Kobiton Portal: https://portal.kobiton.com/sessions/{sessionId}. Replace {sessionID} with the actual ID you received.
Licensed under MIT, see LICENSE.
If you encounter any issues or have questions, please:
- Check the Troubleshooting guide.
- Search the GitHub Issues to see if the issue has already been reported.
- Open a new issue if your problem is not yet addressed at Jenkins issue tracker.
Refer to contributing to the plugin for contribution guidelines.
